Friday, September 28, 2012

Kitty litter cake

One of the things I like to do while at work is share my crafting and cooking stories.  I found that it brings out some pretty creative and interesting stories from my co-workers. This week my co-worker shared with me this rather gross, but disgusting cake idea. It resembles kitty litter.  I don't know if very many people who would want to touch this cake just by the way it looks, but if you can get past it. It will taste pretty delicious!  Haha!  Well I set on a quest to find the recipe. You'd be suprised how many people have attempted this cake. I found a recipe a http://m.allrecipes.com/recipe/7415/recipekitty-litter-cake.

I did not make this cake. I just thought that it would be great to share.  Bon Apetit! Haha!


Thursday, September 27, 2012

Disney's Haunted Mansion


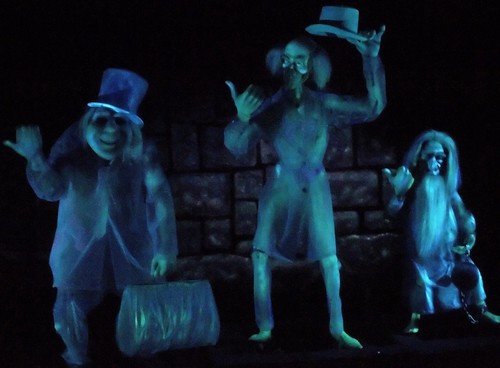
Ever since last Friday when I found that Haunted Mansion video I've had it on the brain! That's when I came up with the bright idea to incorporate some of that theme into my home decor for Halloween. It took me a while to make this wreath mostly because of perfection and weekly things that took time away, but I think it looks pretty good! I suggest having a buddy help you because the painting part can be a little time consuming. 

You will need:
  • 100 clothes pins
  • metal wreath 
  • violet, black and pond colored paint with gloss
  • wooden cutouts
  • mod podge
  • jewelry chain
  • jump rings
  • large screw eyes 1 1/16 
  • drill and drill bit 3/24
  • hitch hiking ghosts cutouts ( I used this picture Hitch Hiking Ghosts)
  • haunted mansion lyrics ( I got the snippet I wanted from disneydesignerland.blogspot.com)
  • black ribbon
  • purple card stock ( 8 by 10)
  • stain

The first thing I did was stained everything wooden! I let it air out and dry for 12 to 24 hours. I wanted it to be able to stand up to most weather conditions. Now start painting the clothes pins. I put mine in piles of 33 and then painted one pile at a time so that colors wouldn't intertwine. Thanks to my loving husband who helped me with this job, both while I was there and at work. I did two coats on the pond and black. The violet I did a third because it appeared more runny for some odd reason. Let them dry for a day. While I was painting the clothes pins I painted the wooden cut outs pond colored. These would later be used for the hitch hiking ghosts.


I added mod podge to my violet and black clothes pins because I learned the hard way with not getting gloss in them. I think getting gloss in yours would be most beneficial and less time consuming. 

Now it's time to place the clothes pins in the wreath. Mine had 4 metal bars. I just alternated between the colors, as I was doing this one went on the top the next would go on the bottom and so forth.


If haven't chosen your hitch hiker yet do so now and cut  them out. Mod podge them to the cut outs and place aside to dry. While this going on print your lyrics and mod podge them to the purple card stock. I cut mine to the length and size I wanted after that. Once it was dry I rolled a little at the top and bottom to give it character.


Now that the boards are ready drill some holes on the tops of them. Only enough so that you will be able to screw the rest in by hand.  Screw the screws half way in. You will need to use pliers to open the hoop part a little to string the jump ring through and then close it. First though place the jump rings on the chains and then the screw hoop. Now you can string the chain through the wreath and then attach on the through the screw again. 


Finally the two easiest steps tie your ribbon and attach your lyrics with the clothes pins. 


Another thing I was working on was a little painting on a wooden plaque that says "Tomb Sweet Tomb". I got the concept from the cross stitch on in the ride! The cool thing is you don't have to do this method either. You can totally make it ally your own. 

To do mine just start out but blotting light brown acrylic paint all over the board. Then in some areas bloat brown and red. 


Same blotting method for the flowers. Some are light pink and some are light green with pink in the middle. 
Then add a white patch in the middle. 


Now add the text and your all done. I added large screw eyes  to the top so I could hang it.


Here are a few other great things I got to help complete  my collection. 


Wednesday, September 26, 2012

Soup

This week has been a crazy week. My husband and I both caught colds and are running it ragged to work and home. Its funny how I'm still trying to fit a craft into what little energy I have left. I had this crazy idea to put a theme or at least try to my fall/ Halloween decor. I think everyone is going to love it once I'm finished.

Well I just want to post my simple homemade soup which is ten times better and makes way more soup then I those store bought cans.

All you need is:

• 1 lb of boneless skinless chicken
• 3 carrots
• 3 celery
• Orecchietta pasta (or your favorite )
• 2 (32 oz.) containers of chicken broth
• tbsp. parsley
• tbsp. olive oil

First place some water in a pot and bring to a boil. Then add the pasta and cook for according to the box. Strain and set aside. Now in another big pot pour the broth and bring it to a boil. While this is going on place olive oil in a pan and cook the chicken. 

Now you can add the chicken, pasta and veggies to the boiling water. Bring down to a simmer and let it simmer for 45 minutes, stirring occasionally. Then sprinkle in your parsley and now your ready to enjoy!

Sorry no picture. :(

Saturday, September 22, 2012

Good Saturday Morning Everyone!

For being a rather busy day yesterday for my husband I think his birthday came out wonderfully! I just want to say right now that fondant is my enemy.  I've tried to do two caked recently with it and it's just not my cup of tea. I'm very surprised that my piping skills are slightly better at the moment.  I ended up becoming an artist and painting a drum onto the fondant.  Kind of glad I figured out I had that skill right? He loved it none the less and that is all that matters. 

Today continues the festivities with his family.  Have a wonderful day everyone!


Friday, September 21, 2012

Happy Friday Everyone!


Wow! So I was already in the spirit of things, as well as I was getting more excited for my trip to Disneyland, but this was the icing in the cake for me! I remember seeing this on one of those Disney Sing-A-Long tapes when I was a kid! I love the Haunted Mansion! Every time I go to Disneyland I ride it like 8 times! I know that sound's crazy, but the kid in me really jumps out when I'm there. Well hope you all enjoy this video as much as I do. Enjoy your weekend!

Thursday, September 20, 2012

Peanut butter, banana and strawberry jelly roulade


My husband's birthday is tommorow so I thought it would be nice if I made him a nice treat to take with him to work. He love's to eat peanut butter and jelly sandwiches, as well as bananas so I thought that it would be cool to make that combo into a roulade. Specifically because I'm going to try to make them into small snare drums! :)

Peanut butter and banana roulade


  • 1/4 cup peanut butter ( crunchy or smooth)
  • 1/3 cup cake flour
  • 1/4 tsp. salt
  • 1 tsp. baking powder
  • 1/4 tsp. banana extract
  • 4 eggs separated
  • 1/2 cup sugar
First line a pan with parchment paper. Then set the oven to 425 degrees.

Now combine the first five ingredients in a medium sized bowl and set aside.

Next take the egg yokes and whip them to soft peaks. I add a little salt and lemon juice to help mine get there faster.


Take the egg yolks and sugar, stir til light yellow. Combine the flour mixture to this mixture. It will become stiff and that is ok.

Gently start to fold the mixture into the egg whites. Be careful not to overdo it.

Now you can pour the mixture into your pan and smooth out with a spatula. Place in the oven for 6-8 minutes. Once it has finished let cool for a couple minutes and them place on a towel, now roll. Let is completely cool now. Then you can add the jelly frosting. 

Once completely cooled add the jelly frosting and re-roll. I place the roulade in plastice wrap and then rolled it back up to stick in the fridge for an hour. 

Jelly Frosting

  • 2 tbsp. butter
  • 1/4 cup vegetable shortening
  • 2 tbsp. strawberry jelly (or flavor of choice)
  • 1/4 tsp. salt
  • 1 cup confectioner's sugar


Wednesday, September 19, 2012

Pumpkin bread

Tis the season to eat all things sweet and pumpkiny! At least that what I told myself as I made a couple loafs for breakfast!  :) This recipe is awesome and a great addition to any fall tradition! 

You will need :

• 1 cup butter, softened
• 1 cup granulated sugar
• 1 cup firmly packed brown sugar
• 1 tsp. vanilla extract
• 4 eggs
• 1(15 ounce ) can of pumpkin
• 2 cups all purpose flour
• 1 1/2 tsp. baking powder
• 1 1/2 tsp. baking soda
• 1 tsp. cinnamon
• 3/4 tsp. salt
• 3/4 cup whole milk

Oatmeal crumble

• 1/4 cup quick cooking oats
• 1/4 cup all purpose flour
• 1/4 cup brown sugar
• 1 tsp. cinnamon
• 1/4 cup butter, cut into pats

Preheat oven to 350°. Spray five (5X3 inch) loaf pans or 2 (6X10) pans.

In a large bowl beat butter, sugars and vanilla until fluffy. Then add one egg at a time.  Now stir in pumpkin.

In a medium bowl combine flour and next four ingredients.  Add to butter mixture,  alternating with milk, ending with flour.  Spoon batter into pans and sprinkle oatmeal crumble on top.

Bake 30 minutes for the small pans and 45 for the bigger, or until a wooden pick comes out clean. Let cool for 10 minutes and the remove from pans to cool completely.

Oatmeal crumble

In a small bowl combine first 4 ingredients.  Using a pastry blender cut the butter until mixture is crumbly.

Now for the best part … Enjoy!